Hey hey hey!
Chlo Jack is back with some info on my latest experience!
So my mum and I both received a ring making voucher! Another voucher would you believe! 😉 If I had a pound for every time that I started a blog with; “I had a voucher” – Well I think I’d by rich now! Vouchers are just great though! This one certainly was!
About Shinafoot Studio ?
The class was based at Shinafoot Studios, which is located in Dunning Perthshire. It is a very nice South African lady who owns and runs the classes. The studio is fairly easy to find, it is all signed posted. However I must tell you that Shinafoot Studios will be moving at some point soon, but it will be confirmed where, on their website soon! The studio also runs pottery making classes and lessons! Visit her website here. It was an incredible space and great materials and resources! 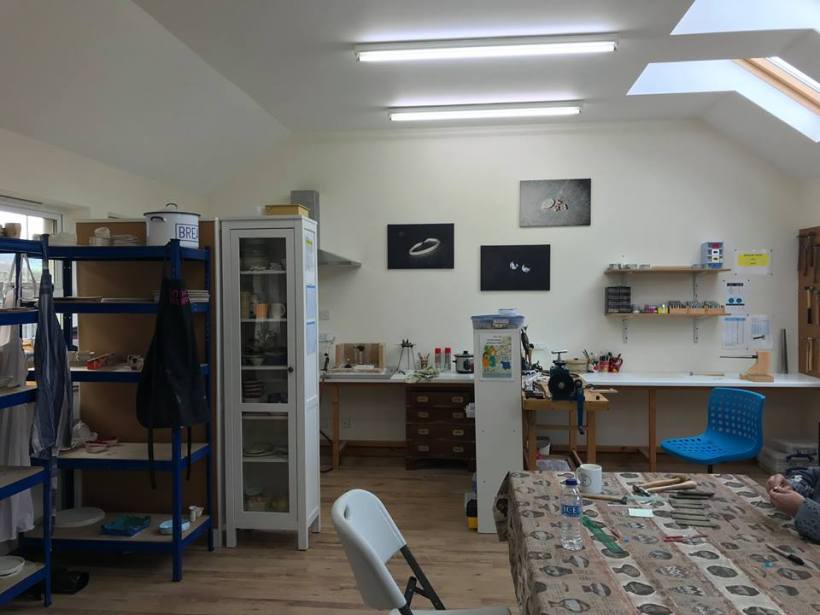
The ring making process
The ring making process is fairly straightforward and simplistic! It does help if you are a creative and crafty individual- like my mum and I! There were 10 stages to making the ring!

Stage 1: Measure up!
First up we measured the finger that we were making the ring for. Then measured out our piece of sterling silver. I was a size O 😉


Stage 2: Cut it!
We carefully used the saw to cut off the excess silver, making sure to cut down the guided line we drew. (Steady does it!)

Stage 3: File it and join it up!
We filed down our line to make it flat and fine so that it would join together well when coming to the soldering stage! Our tutor used the pliers to join it together. This is the first stage of it being an almost ring shape.


Stage 4: Soldering!
I like stage 4 and 5! Next up we applied a little soldering down the join of the ring.

Stage 5 Fire it up!
We applied heat to it until the soldering dissolved!

Stage 6 Cool and apply to acid!
So our tutor took control in this stage. She cooled it down by placing it in cold water and then popped it into hot acid for a couple of moments. (Very dangerous stage). The ring was then removed from the acid and put in water to remove any acid.

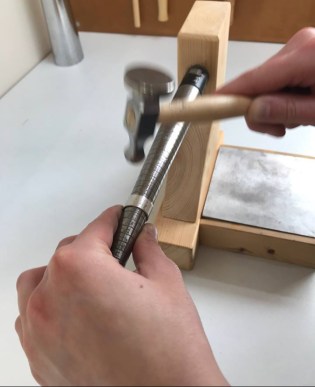
Stage 7 Shape it into a ring and see if it fits!
This is the stage you get to see if the ring fits! So we placed it on the bench and used a hammer to bash it along into a circle shape. Unfortunately my ring needed a little TLC, as we found that it was a tiny bit too big for my finger. So I redid a couple of the stages before and took a little smidgin off! Mum’s came out perfectly! 🙂

Stage 8 File and polish it
Next we refined any areas that required filing down and polished any imperfections, leaving a smooth finish.


Stage 9 Print the design
So next up we got to choose the print for our ring. This meant choosing a hammer print. There was a; criss cross, diagonal lines or dimples. We choose the dimple print. We carefully bashed the ring to indent the print onto the silver ring.
Stage 10 Shine it up!
Lastly the rings were put in a polishing machine to give them a buff up and shine!

Stage 11 Picture time!
We were then presented with our very own handmade sterling silver ring!

We were delighted to leave with a handmade sterling silver ring. It was a really lovely time spent with my mum.
My time, and my ring will be cherished forever! ❤
Stage 12 Lunch!!
By this time we had worked up an appetite for a spot of lunch! lol
So, if you fancy this why not give Shinafoot Studios a call: 07719679360 !
That’s all for now! I hope you have enjoyed this blog!
Lots of Love from
Chlo Jack !
XoX
“A lifestyle blog written by a Scottish Lassie!” 😉 ❤

Aw this sounds like such fun!
LikeLiked by 1 person